
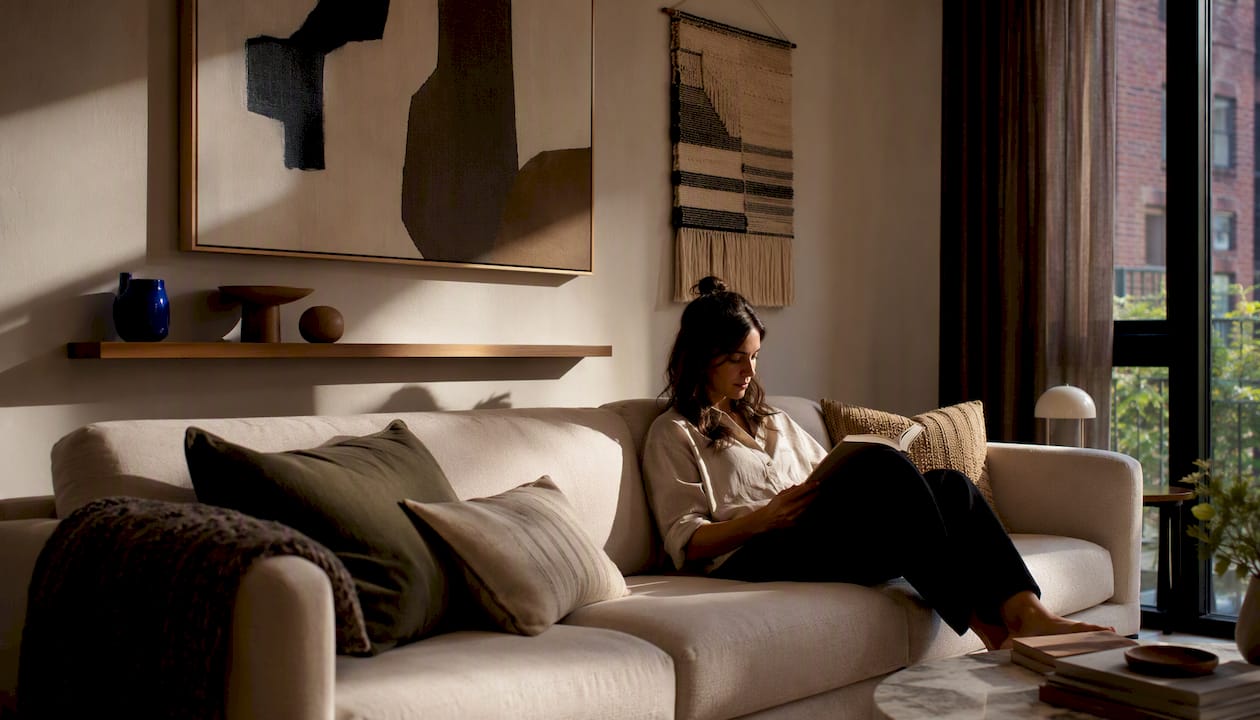
The fastest fix for a blank wall behind your sofa is one oversized piece of art, sized to two-thirds the width of your sofa and hung 6 to 10 inches above the cushions. If you rent or simply don’t want holes in the wall, a removable, adhesive-mounted feature wall gets you the same visual weight without touching a drill.
TL;DR:
- Art should be about two-thirds the width of the sofa and hung 6 to 10 inches above the back for optimal visual balance.
- Removable, adhesive-mounted panels like DwellForms™ provide a textured or colorful feature wall without damaging rental walls or requiring drilling.
- Gallery walls need a unifying element, such as color or frame finish, to avoid clutter, and should follow spacing and size guidelines for cohesion.
- Wall arrangements should support the sofa’s composition, avoiding clutter, over-layered setups, or high-hanging art that disrupts visual harmony.
- Lighting should be soft and directional to highlight textures, colors, and arrangements, preventing a wall from looking flat or messy after dark.
Table of Contents
- Behind sofa wall ideas: 10 practical layouts to try
- The sizing rules that make any wall look intentional
- Renter-friendly ways to skip the drill entirely
- Styling and lighting that bring the wall to life
- Common mistakes and how to fix them fast
- Why composition beats filling every gap
- Get colour and texture behind your sofa without touching the wall
- Sources
- FAQ
Behind sofa wall ideas: 10 practical layouts to try
Every wall behind a sofa is really asking the same question: what gives this seating area a sense of composition, rather than a gap it’s politely ignoring? These ten approaches answer that question in different ways, from the fastest fix to the most textural.
1. One oversized piece of art. Large-scale art remains the simplest and fastest way to anchor a sofa-backed wall. Measure your sofa, size the art to two-thirds of that width, and hang the bottom edge 6 to 10 inches above the sofa back.
2. A gallery wall with one unifying thread. Mixed frames and mismatched subjects read as clutter unless something ties them together, whether that’s frame finish, a shared palette, or spacing of 2 to 3 inches between pieces. Our step-by-step gallery wall guide walks through the layout maths.
3. Floating shelves or ledges. Shelves set 6 to 10 centimetres deep hold books, small art and objects without eating floor space. Style them in odd-numbered groupings of three or five, mixing tall, short and leaning pieces so the eye has somewhere to land.
4. A console or sofa table. When your layout allows a few centimetres of clearance, a console table set at or slightly below the height of your sofa back turns dead space into a purposeful zone for lamps, trays or a stack of books.
5. A mirror. Positioned to bounce light rather than reflect the television or a cluttered doorway, a mirror behind the sofa can make a narrow living room feel a third larger.
6. Textiles and tapestries. A woven hanging or lightweight tapestry adds warmth and pattern, hangs from a single hook or rod, and comes down in seconds when you move, which makes it one of the more forgiving options for a rental.
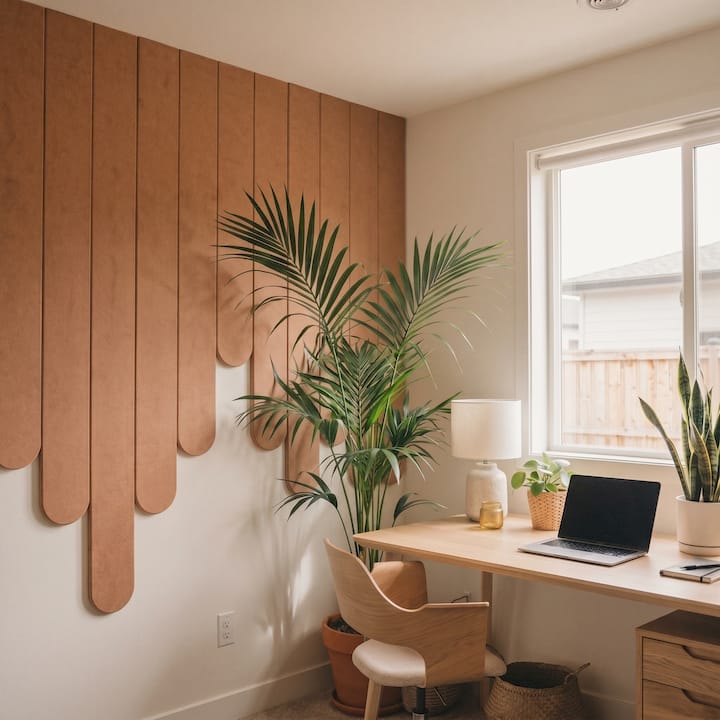
7. Removable panelling or slats. Modular, no-drill wall systems bring the architectural look of panelled walls without the joinery, and they lift off just as easily as they went up.
8. Wall-mounted planters and greenery. Trailing pothos or a low-light-tolerant plant in a wall-mounted pot softens a hard wall. Stick to species that cope with the indirect light most sofas sit under.
9. Sculptural objects and woven baskets. A cluster of baskets, ceramic forms or a single sculptural mirror brings texture without the visual noise of busy patterns, and it fills a wide wall without needing multiple frames.
10. Modular adhesive wall panels. For colour and shape rather than flat art, panel kits like DwellForms™ use adhesive mounting to build a sculptural, coloured feature wall that lifts off cleanly when you shift furniture or move house.
The sizing rules that make any wall look intentional
Most behind-sofa walls fail for one of two reasons: the art is too small, or it’s hung too high. Fix both and almost anything looks deliberate.
- Size your art or arrangement to roughly two-thirds to three-quarters of your sofa’s width. A 210cm sofa suits a piece (or grouped arrangement) around 140 to 155cm wide.
- Leave 6 to 10 inches (15 to 25cm) between the top of the sofa back and the bottom edge of the artwork, the proportion most designers work to.
- Centre everything on the sofa itself, not the wall. If your sofa sits off-centre in the room, your art follows the sofa.
- For sectionals, treat the longest run as your width measurement and consider a spread of smaller pieces rather than one canvas trying to cover an L-shape.
- Heavy framed pieces need a stud or a rated picture hook. Lighter panels and prints can rely on renter-safe adhesive systems instead.
Renter-friendly ways to skip the drill entirely
You don’t need a single hole to build genuine wall impact, and that matters if you’re renting or simply don’t want to patch plaster before your next inspection.
- Removable adhesive strips and hooks hold lightweight frames and prints without marking paint, provided you stay under their rated weight limit.
- Picture ledges let you lean and layer art, swapping pieces seasonally without rehanging anything.
- Leaning oversized art against the wall, rather than hanging it, sidesteps fixings altogether and still delivers scale.
- Adhesive-mounted modular panels bring colour and dimension to a wall while staying fully removable, which suits renters chasing visual impact without commitment.
DwellForms™ by Lifted+ is built around exactly this brief. It’s a New Zealand designed wall system made from precision-cut PET felt, produced from 100% recycled plastic, and installed using tested adhesive pads instead of screws or construction adhesive. Panels can be rearranged on the same wall or taken with you to your next rental, which makes colour and texture something you commit to for a season, not for the life of the lease.
Pro Tip: Test your adhesive pads on a small, inconspicuous patch of wall first, especially on textured paint or older plaster, before committing to a full layout.
Heavier framed mirrors or dense timber shelving are the exception. If a piece weighs more than a few kilograms, a stud fixing or a rated wall anchor is still the safer route, even in a rental, provided your lease allows it.
Styling and lighting that bring the wall to life
A well-sized wall can still fall flat under the wrong light or a cluttered arrangement. Cohesion and light are what separate a considered wall from a busy one.
- Keep gallery walls unified through consistent frame finishes or one restrained palette, rather than mixing timber, gold and black frames at random.
- Swap harsh overhead downlights for soft, directional picture lights or a plug-in sconce; directional lighting reveals texture that flat ceiling light flattens out.
- Pull one accent colour from your cushions or rug into the wall treatment so the whole seating area reads as one composition.
- On shelves, mix tall, short and leaning objects, and deliberately leave a third of the shelf empty. Crowded shelves lose their rhythm fast.
Common mistakes and how to fix them fast
Most of these are quick corrections, not full redos.
- Hanging too high: bring the frame down so its base sits 6 to 10 inches above the sofa back.
- Art too small: rehang as a pair or swap to a piece closer to two-thirds of your sofa’s width.
- Too many layers: cap yourself at two visual layers (art plus one shelf, say) rather than stacking art, shelves and textiles together.
- Ignoring night-time light: switch your lamps on before you finalise anything. A wall that looks balanced at midday can vanish after dark.
Why composition beats filling every gap
The wall behind your sofa isn’t a separate canvas waiting to be filled. It’s part of the seating composition, and it should support that grouping rather than compete with it. Pick one clear strategy, whether that’s a single oversized piece or a considered shelf arrangement, and live with it before adding more.
As someone who’s spent years watching living rooms get overworked one well-meaning addition at a time, my honest advice is to resist finishing the wall in a single weekend. Restraint reads as intention. Clutter reads as indecision, no matter how good each individual piece is.
— Michelle
Get colour and texture behind your sofa without touching the wall
Every option above works, but most either need a drill, a landlord’s sign-off, or a hole-patching kit when you move out. DwellForms™ skips all three.

If you’re not sure where to start, order a set of DwellForms™ Colour Samples to see how a shade sits against your sofa and light before you commit. From there, choose a DwellForms™ Core Kit sized to your wall, and grow the layout later with a DwellForms™ Extension Kit if you want to cover more of the wall or extend into a hallway. If you’d rather lean into art instead of panels, browse oversized wall art sized for a no-hole, leaning setup on a console table.
Sources
For deeper detail on frame spacing and layout templates, see the gallery wall alternatives guide and the safe hanging guide for oversized art. For styling cues that extend beyond the wall itself, pet-friendly bedding and living room textures covers complementary fabric choices for pet-owning households.
FAQ
What can I put on my wall behind my sofa?
Oversized art, a gallery wall, floating shelves, a console table, a mirror, textiles, greenery, or a removable modular panel system like DwellForms™ all work, depending on how much surface you want to cover and whether you want colour or imagery.
What is the two-thirds rule for sofas?
Size your art or wall arrangement to roughly two-thirds to three-quarters of your sofa’s width, then hang it 6 to 10 inches above the sofa back, a ratio designers use to keep the wall in proportion with the seating.
How do I design a wall behind a sofa?
Start with the sofa’s width and height as your measurement guide, choose one clear strategy such as a single large piece or a shelf arrangement, keep frames or colours cohesive, and light it with soft directional light rather than harsh overhead downlights.
What can I put behind a sofa if I’m renting?
Removable adhesive hooks, leaning art, picture ledges, and adhesive-mounted modular panels such as DwellForms™ all deliver strong visual impact without drilling or damaging rental walls, and they come down cleanly when you move.
How much does a DwellForms™ kit cost?
Pricing for DwellForms™ Core Kits, Extension Kits and Colour Samples is available directly on the Liftedplus product pages.
The oversized art guideline—about two-thirds the sofa’s width and 6–10 inches above the cushions—is a practical detail that makes these renter-friendly ideas much easier to visualize. I also like the recycled PET felt wall kits as a softer, removable way to add colour without drilling.
The two-thirds-of-the-sofa rule is a helpful guideline, and I like the idea of using oversized art for impact without making the space feel cluttered. The removable PET felt wall kits also sound like a smart renter-friendly way to add texture behind the sofa.