
TL;DR:
- A gallery wall transforms blank walls into personal narratives, adding character and a sense of habitation. Proper planning, measurement, and thoughtful mixing of media and scale are essential for an impactful, enduring display. Continual updates and genuine personal choices ensure the wall remains a lively reflection of your evolving story.
You have the photos, the prints, maybe a small sculpture or two, yet the wall stays blank. That particular kind of visual silence is one of the most common frustrations we hear from New Zealand homeowners who want their spaces to feel truly personal rather than simply furnished. A gallery wall solves this beautifully. Done well, it pulls a room out of the polite middle, introduces a sense of narrative, and makes a space feel genuinely inhabited. This guide will take you through every stage, from gathering your tools to choosing pieces that mean something, so the result is one you will want to live with for years.
Table of Contents
- What you need before starting your gallery wall
- Step-by-step: Plan, arrange, and hang your gallery wall
- Troubleshooting and common gallery wall mistakes
- How to make your gallery wall truly personal
- Our perspective: Why gallery walls are about more than just art
- Ready to create your own gallery wall?
- Frequently asked questions
Key Takeaways
| Point | Details |
|---|---|
| Preparation is key | Gather the right tools and materials before starting to avoid unnecessary stress. |
| Strategic layout matters | Visualise your arrangement on the floor or with templates to perfect the layout before committing. |
| Mix art and objects | Combining prints, photos, and keepsakes personalises your gallery wall and creates depth. |
| Fix mistakes easily | Most hanging errors like crooked frames or poor spacing are simple to correct with patience and the right technique. |
What you need before starting your gallery wall
Now that you are inspired, let us make sure you have everything on hand before that first nail goes in.
Preparation is where most gallery walls succeed or fail. Rushing to hang pieces without a plan leads to awkward gaps, crooked frames, and the kind of patchwork look that signals uncertainty rather than intention. The good news is that the prep process itself is genuinely enjoyable, especially once you understand what you are working toward. Our DIY art wall basics guide expands on this foundation if you want deeper reading alongside this article.
Your essential toolkit includes:
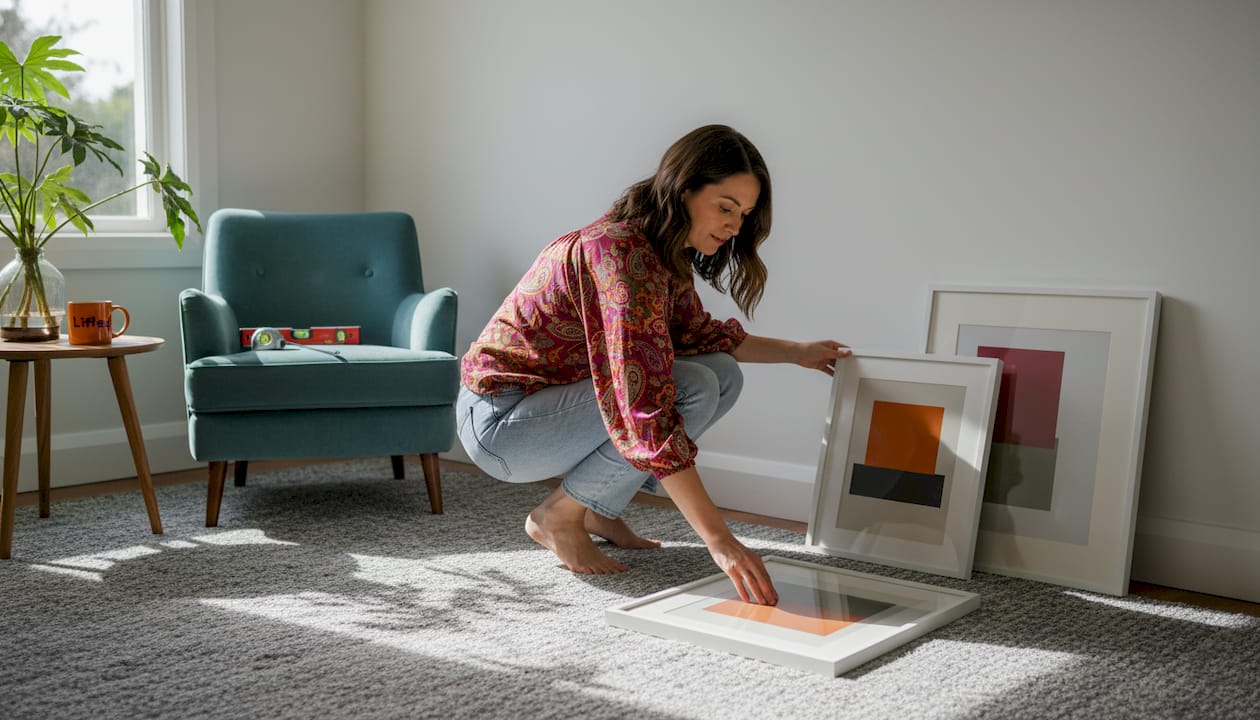
A measuring tape, pencil, hammer, spirit level, nails or picture hooks, painter’s tape, and a stud finder if your walls are plasterboard. You will also want a roll of craft paper or brown paper for making templates, scissors, and some sticky tack to temporarily hold paper mock-ups in place.
Wall type matters enormously. Plasterboard is the most forgiving and the most common in modern New Zealand homes, accepting standard picture hooks with minimal fuss. Older villas and bungalows often feature plaster over wood lathe, which requires a little more care but is still manageable with the right hardware. Brick or concrete surfaces, found in townhouses and converted commercial spaces, need masonry anchors or adhesive strips rated for the weight you plan to hang.
When it comes to frame choices, the variety available can feel overwhelming. Timber frames in warm oak or walnut tones bring an organic warmth that suits many New Zealand interiors. Black metal frames offer a graphic, contemporary edge. Thin gallery frames in white or off-white keep the focus on the art itself. Mixing frame styles works well when you maintain a consistent finish, for example, all matte rather than all gloss, or all metal regardless of colour. For guidance on scale, choosing art sizes is worth bookmarking before you commit to any purchases.
| Hanging method | Best for | Weight limit | Ease of adjustment |
|---|---|---|---|
| Picture hooks and nails | Most standard frames | Up to 15 kg | Moderate |
| Adhesive strips | Lightweight pieces, renters | Up to 3 kg | Easy |
| D-ring wall anchors | Heavy or large frames | Up to 30 kg | Low |
| Toggle bolts | Plasterboard without studs | Up to 20 kg | Low |
Pro Tip: Before touching your wall, lay all your intended pieces on the floor in the rough arrangement you are imagining. Step back and look from a slight distance. This simple exercise reveals awkward size contrasts, colour clashes, or spacing issues that are far easier to fix on the floor than three metres up a ladder.
Step-by-step: Plan, arrange, and hang your gallery wall
With your essentials gathered, it is time to turn ideas into action with a clear system for layout and installation.
The physical process of building a gallery wall has a satisfying logic when you follow each step in order. Trying to skip ahead, particularly past the measurement and template stages, is where most people encounter problems they later have to undo. Work methodically and the whole project feels manageable, even rewarding. For those exploring gallery wall alternatives too, some of these steps translate directly to other arrangements.
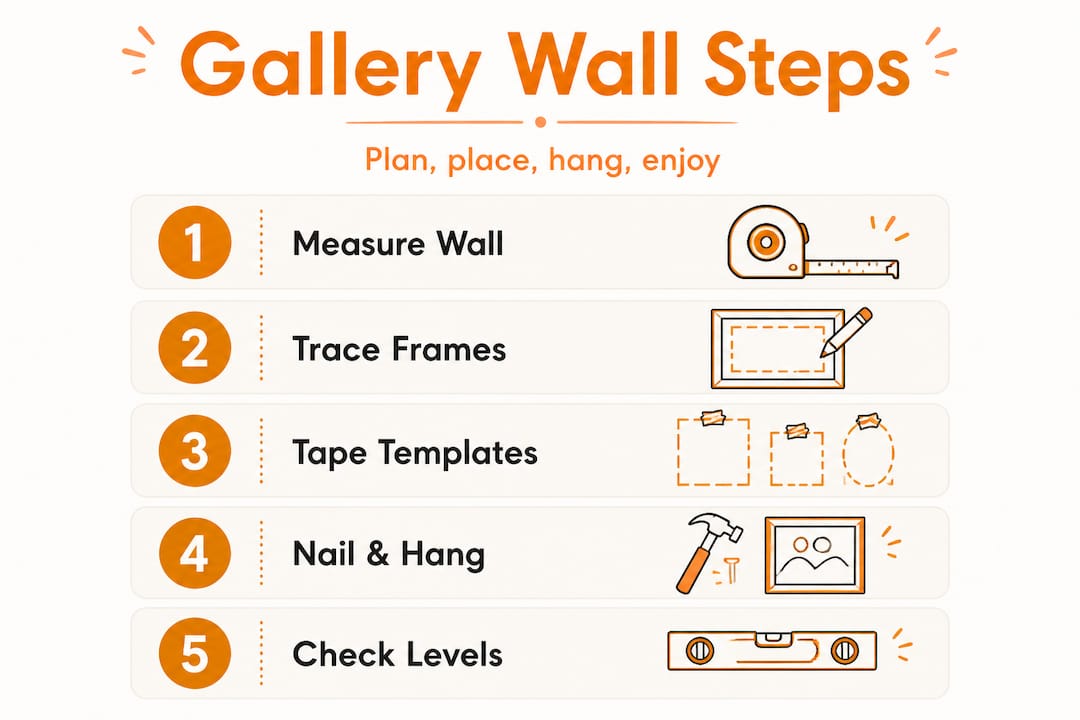
Step 1: Measure and mark your wall space. Decide on the overall footprint of your gallery wall. A common recommendation is to treat the grouping as a single piece of art, keeping its total shape in proportion with the furniture below it. For a sofa or sideboard, aim to fill about two thirds of the furniture’s width. Mark the outer boundaries lightly with a pencil.
Step 2: Trace your frames onto paper. Cut out paper templates for each piece you plan to hang. Mark where the hanging hardware sits on each template so your nail placement is accurate. This step takes patience but saves considerable frustration.
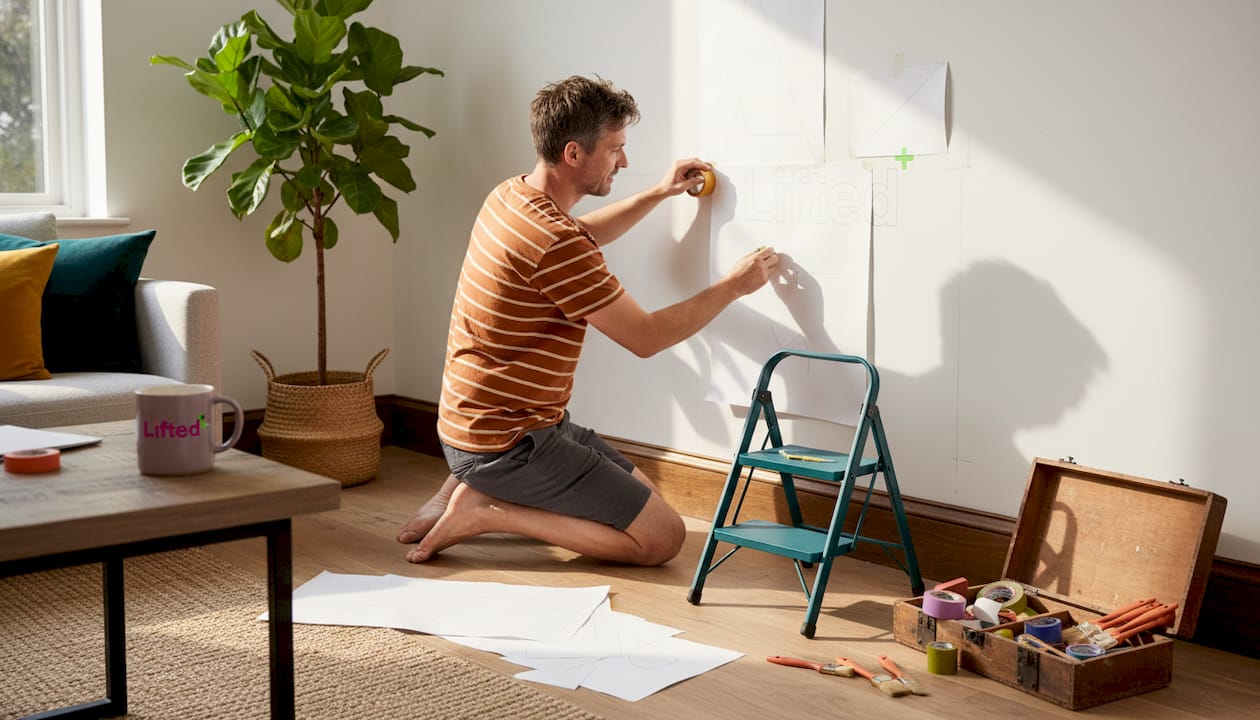
Step 3: Arrange templates on the wall using painter’s tape. Tape the paper templates directly onto the wall in your chosen arrangement. Stand back repeatedly as you adjust. Live with it for a day if you can. Natural light changes throughout the day in New Zealand homes and what looks balanced at noon can feel heavy by late afternoon.
Step 4: Nail through the templates. Hammer your nail or hook directly through the paper template. Once the nail is secure, gently tear the paper away. The nail stays, perfectly placed. This technique dramatically improves accuracy and is one of the most satisfying tricks in the process.
Step 5: Hang in a logical order. Start with your largest or most central piece and work outward. This anchors the arrangement and gives you reference points for spacing. For statement wall art that anchors the whole composition, placing it first is particularly important.
Step 6: Check levels as you go. Use your spirit level after each piece is hung. Do not rely on eye alone, especially in older homes where walls and floors may not be perfectly true.
| Step | Task | Estimated time | Skill level |
|---|---|---|---|
| 1 | Measure and mark wall | 15 minutes | Beginner |
| 2 | Trace and cut templates | 20 minutes | Beginner |
| 3 | Arrange and tape templates | 30 minutes | Beginner |
| 4 | Nail through templates | 20 minutes | Beginner |
| 5 | Hang artwork in order | 30 minutes | Beginner/intermediate |
| 6 | Level and adjust | 15 minutes | Beginner |
Gallery wall arrangements in New Zealand apartments respond particularly well to vertical compositions in rooms with lower ceilings, as noted in our apartment wall art ideas feature. For more expansive lounge walls, a horizontal spread often suits the proportions better, and large-scale wall art can hold its own as the gravitational centre of an entire grouping.
Pro Tip: Photograph your floor arrangement before you begin taping templates to the wall. If anything shifts during the transition from floor to wall, you have a clear reference image to return to without having to reassemble everything.
Troubleshooting and common gallery wall mistakes
Even careful planners hit a hiccup. Here is how to sidestep or fix common gallery wall blunders.
The most frequent issue is crooked frames. A frame that sits even slightly off kilter draws the eye immediately and unsettles the entire arrangement. The fix is simple: apply a small piece of rubber furniture grip or sticky tack to the bottom corners of each frame. This prevents frames from rotating on their hooks as people move past or doors open and close nearby.
Overcrowding is the second most common problem. More pieces do not always mean more impact. When frames are too tightly packed, the individual works lose their ability to breathe and the wall reads as cluttered rather than curated. Aim for consistent gaps between pieces, typically between 5 and 10 centimetres, and do not be afraid to leave some pieces off the wall if they weaken the overall composition.
Mismatched scale causes visual tension of the unwanted kind. A collection of small A5-sized prints scattered across a large wall looks apologetic rather than intentional. The solution is to either group small works tightly so they register as a single mass, or anchor them with at least one larger piece. Our guide to art sizing explains these spatial relationships in practical detail.
For heavier works, proper fixings are not optional. A ceramic piece or a large framed canvas can cause real damage if it falls. In New Zealand homes built in the last two decades, locating a wall stud with a stud finder and fixing directly into timber is the safest approach. For pieces over five kilograms, use D-ring hardware and wall anchors rated to at least double the artwork’s weight.
Safety note: Never hang heavy pieces using adhesive strips alone, even if the product packaging suggests the weight rating is sufficient. Humidity, wall texture, and time all reduce adhesive performance, and the consequences of a heavy piece falling, particularly above furniture or a bed, are serious.
Considering the impact of oversized art before committing to a mixed-scale arrangement can help you avoid scale errors before they become expensive corrections.
Quick fixes worth keeping in mind:
Use a strip of blue painter’s tape on the back of each frame to mark the hanging point before you transfer it to the wall. Wipe frames with a barely damp cloth before hanging to remove any fingerprints or dust from handling. Keep a pencil eraser nearby for removing any visible pencil marks after hanging. Check the wall behind your arrangement for light switches or vents that may obstruct certain pieces.
How to make your gallery wall truly personal
With the technical details sorted, let us explore how to infuse your wall with authentic style and personal stories.
The most memorable gallery walls are never simply assembled from a single purchase. They accumulate over time, layer by layer, each piece carrying some trace of experience, travel, friendship, or a phase of life that mattered. This is what separates a gallery wall that feels alive from one that merely fills space. For those open to exploring beyond framed prints, our feature on 9 fresh alternatives to a gallery wall offers some genuinely unexpected directions.
Mixing media is where a gallery wall gains real character. Consider pairing photographic prints with botanical illustrations, a small woven textile, a ceramic wall tile, or even a sculptural object mounted on a simple ledge shelf. Varying texture and dimension prevents the arrangement from reading as flat. It introduces a tactile quality that framed prints alone cannot achieve.
Colour is one of the most powerful unifying tools at your disposal. You do not need every piece to share a palette, but finding a thread, perhaps a warm terracotta tone running through several works, or a recurring shade of deep forest green, creates a cohesion that feels effortless. For those with double height walls to contend with, colour becomes even more important as a device for visually connecting pieces across a dramatic vertical span.
Seasonal rotation keeps the wall from becoming invisible. When decor is unchanged for too long, we stop seeing it. Swapping out two or three pieces every few months, perhaps moving with the light and colour shifts of the New Zealand seasons, refreshes the entire composition without requiring a complete rebuild.
Pro Tip: Rather than buying everything at once, commit to collecting one or two meaningful pieces each year. Whether it is a print from a local New Zealand artist, a photograph from a trip, or a gift from someone you love, this slow accumulation produces a far more layered and authentic result than any single shopping session could.
Elements that bring personal depth to a gallery wall:
Handwritten notes or letters framed simply. Postcards from places that shaped you. Artworks by local or emerging New Zealand artists. Objects that hold sentimental weight, a small piece of driftwood, a pressed native fern. Black and white family photographs mixed with full-colour contemporary prints.
Our perspective: Why gallery walls are about more than just art
In reflecting on countless gallery wall projects, we have learnt one overriding truth: the walls that resonate most deeply are the ones that refuse to be finished.
There is a tendency, particularly in design-conscious circles, to treat a gallery wall as a project with a clear completion point. Once the last frame is hung and the levels are checked, the work is done. But the most emotionally powerful gallery walls we have seen in New Zealand homes are restless in the best sense. They shift as the people in the home shift. A new print appears after a trip. A childhood photo gets reframed. A ceramic piece found at a local market nudges everything else into a new conversation.
This is why we resist the idea that gallery walls are simply a trend. They are, at their core, a practice of attention. Choosing what goes on your wall is choosing what you want to see when you walk into a room. It shapes mood, stirs memory, and signals something true about who you are and what you value.
We have seen clients transform entire rooms not by renovating, but by finally committing to the blank wall they had been avoiding for years. The energy that comes back from a space that finally feels considered is something that photographs struggle to capture. It is felt. Our best statement wall art edit is a good place to find works with genuine presence if you are starting from scratch.
The conventional advice tends to focus entirely on technique: spacing, sizing, hardware. Those things matter, but they are in service of something larger. A gallery wall done with genuine personal investment does not just decorate a room. It holds the room.
Ready to create your own gallery wall?
Inspired to get started? Here is how Lifted+ can help you take the next step.
At Lifted+, we curate wall art and decor with the specific character of New Zealand homes in mind: the light, the proportions, the textures. Our collections are seasonal and limited, selected for form, presence, and the kind of quiet impact that lasts.
Browse our wall art collection to find pieces that suit your space and your story. If you are building a look from the ground up, our editorial on modern home decor in NZ offers rich inspiration for layering colour, texture, and form across an entire room. And if you want to understand how individual pieces can personalise your space on a deeper level, that guide is well worth your time before you start selecting.
Frequently asked questions
How do I choose the right frames and art sizes for my gallery wall?
Select frames that complement your existing decor style and use the largest piece as your anchor, then build outward with progressively smaller works. Our art sizing guide covers the spatial relationships in detail.
Can I mix photos, prints, and objects on a single wall?
Yes, and doing so is what gives a gallery wall genuine depth and character, rather than the look of a catalogue page. Exploring alternatives to traditional gallery walls can spark ideas for incorporating non-framed objects with confidence.
What is the best way to avoid crooked or uneven frames?
Use a spirit level after every single piece is hung and apply rubber grip pads or sticky tack to the bottom corners of each frame to prevent rotation over time. Paper templates nailed through as described in our art wall step-by-step also dramatically improve placement accuracy.
How often should I refresh or rearrange my gallery wall?
Updating your gallery wall every few seasons keeps the space feeling alive and stops you from becoming blind to what is there. Even small changes, one new print or a reframed photograph, can shift the entire energy of the arrangement. Our apartment wall art ideas for NZ homes feature offers seasonal inspiration to keep things moving.