
TL;DR:
- Proper lighting arrangement is key to bringing life to modern Kiwi interiors.
- Layered lighting with different fixtures and zones creates depth and flexibility.
- Safety regulations require professional installation, especially in wet areas, with attention to fixture ratings.
There is a particular kind of frustration that comes from standing in a beautifully furnished room that still feels flat. The furniture is right, the colours are considered, and yet something about the space refuses to come alive. More often than not, the culprit is lighting. Not the absence of it, but the wrong arrangement of it. In modern New Zealand homes, where open-plan living, high ceilings, and natural timber finishes define the aesthetic, the way you place your fixtures can either animate a room or leave it stranded somewhere between functional and forgettable. This guide will walk you through every step.
Table of Contents
- What you need: Tools, requirements, and NZ regulations
- Step-by-step: Planning your lighting arrangement
- How to install and adjust fixtures for best results
- Testing, tweaking, and styling your finished look
- A designer’s perspective: What most guides miss about modern lighting
- Ready to transform your space? Get inspired and shop lighting now
- Frequently asked questions
Key Takeaways
| Point | Details |
|---|---|
| Understand NZ requirements | Always check bathroom zones, IP ratings, and recommended brightness for every space. |
| Plan in layers | Combine ambient, task, and accent lighting for balance and flexibility. |
| Test and adjust | Use dimmers and moveable fixtures to fine-tune mood and function. |
| Prioritise safety | For any hardwired or bathroom fixture, call a qualified electrician to ensure compliance. |
What you need: Tools, requirements, and NZ regulations
Now that you’ve seen how crucial lighting is to your space, let’s ensure you’re prepared with the right gear and safety know-how before a single fixture goes up.
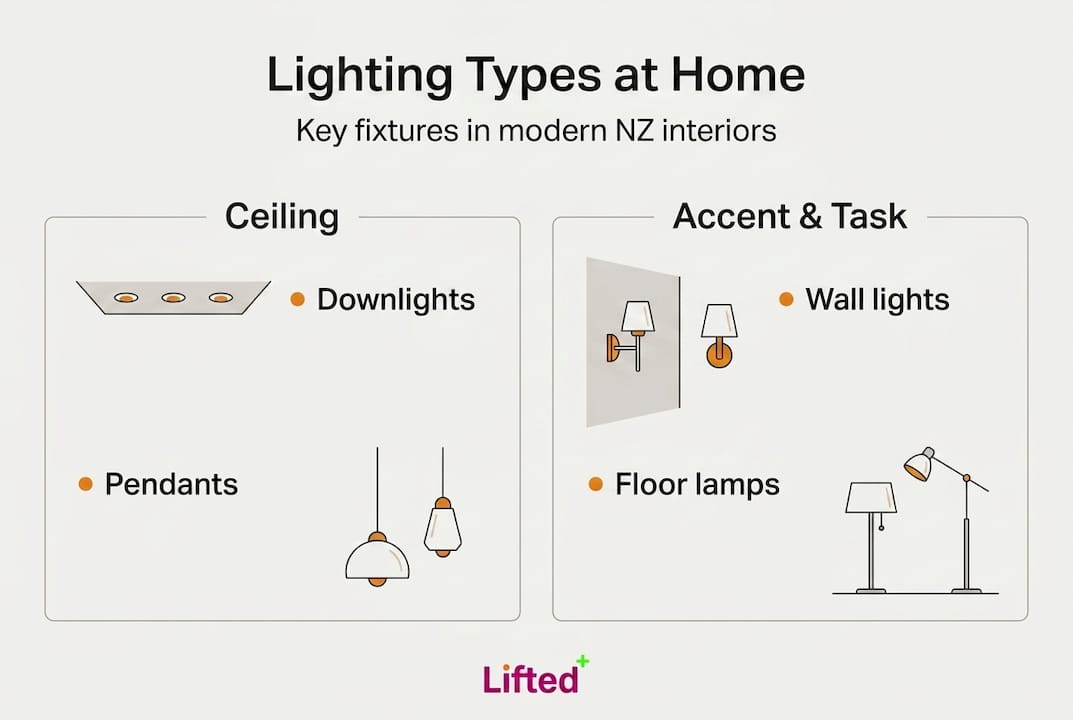
Modern New Zealand homes call for a layered mix of fixture types. Pendant lights bring sculptural form and visual hierarchy, particularly over dining tables and kitchen islands. Recessed downlights distribute even ambient light across open-plan spaces. Wall sconces add warmth and directional interest without consuming ceiling real estate. Track lighting offers flexibility for gallery-style arrangements or rooms that evolve with the seasons. Floor lamps and table lamps complete the picture, adding intimacy at ground level and allowing you to shift the mood with minimal effort.
Understanding NZ lighting safety guidelines is not optional. New Zealand has clear requirements for bathroom zones and general lux benchmarks, and knowing them before you shop saves costly rework. Colour temperature matters just as much as brightness. According to bathroom zone compliance, warm white at 2700 to 3000K suits modern NZ homes, while general household areas should achieve at least 150 lux, task zones like reading nooks need 300 to 500 lux, and fine detail work demands 800 lux or more.
Bathrooms require particular attention. IP ratings indicate how well a fixture resists water ingress. Zone 0 (inside the bath or shower basin itself) requires IP67 rated fixtures at 12V maximum. Zones 1 and 2 (areas directly above and adjacent to the bath or shower) require at minimum IP44 protection. These are not guidelines you can interpret loosely.
Important: In New Zealand, installing any hardwired fixture in a bathroom zone without the correct IP rating is a building code violation. Always verify fixture ratings before purchase, and engage a licensed electrician for any wet area work.
The different designer lighting types available will suit different rooms, and knowing which tools you need before you start keeps the process smooth.
| Room | Recommended fixture types | Lux target | Colour temperature |
|---|---|---|---|
| Kitchen | Pendants, recessed downlights, under-cabinet strips | 300 to 500 lux | 3000K |
| Lounge | Floor lamps, wall sconces, pendants | 150 lux ambient | 2700K |
| Bathroom | IP44 or IP67 rated ceiling fixtures, vanity lights | 300 lux at vanity | 3000K |
| Study | Adjustable desk lamps, recessed downlights | 500 to 800 lux | 3000K |
| Bedroom | Wall sconces, bedside lamps, dimmable downlights | 150 lux general | 2700K |
Essential tools and materials for the process include: a lux metre or lux metre app on your smartphone, a stud finder, a voltage tester, ceiling rose fixings and mounting brackets, LED globes in your target colour temperature, a drill and drill bits, and a licensed electrician’s contact details for any hardwired work.
Step-by-step: Planning your lighting arrangement
With tools and regulations in hand, it’s time to start sketching out your lighting concepts.
Planning is where good lighting actually begins. Rushing to install before you have mapped out your zones and fixture relationships is one of the most common reasons rooms end up with flat, uninspiring results. Here is a clear sequence to follow.
-
Map your activity zones. Walk through each room and identify the primary activities that happen there. Cooking, reading, watching television, working, and sleeping each demand different light intensities and directions. Mark these zones on a rough floor plan.
-
Set your lux targets per zone. Referencing general lux benchmarks, assign your targets before choosing fixtures. General living areas need 150 lux. Task-heavy zones like study desks, kitchen benchtops, and bathroom vanities need 300 to 500 lux. Fine detail work demands 800 lux or above.
-
Sketch your fixture layout. With zones and targets defined, begin placing fixture types on your floor plan. Think in three layers: ambient (general room light), task (focused functional light), and accent (decorative or directional light that creates visual interest). Rooms that only have one layer tend to feel either harsh or dim, regardless of wattage.
-
Consider natural light timing. New Zealand’s latitude means the angle and quality of daylight shifts considerably across seasons. A room that feels bright in summer may feel cave-like by winter. Plan your artificial lighting to supplement natural light at its weakest, not just to mirror what the sun provides.
-
Choose fixtures for form as well as function. A pendant over the kitchen island is not just a task light. It defines the visual centre of the room. Similarly, a sculptural floor lamp in the corner of a lounge brings shape to the air and creates depth that a recessed downlight simply cannot.
-
Plan your switching and dimming circuits. Dimmers are not a luxury. They are the most affordable way to transform a room’s atmosphere across different times of day and seasons.
Pro Tip: Before committing to hardwired fixture positions, test your layout using plug-in equivalents. A plug-in pendant or floor lamp placed at your intended position will give you a realistic preview of how the light falls and whether the fixture’s silhouette suits the room.
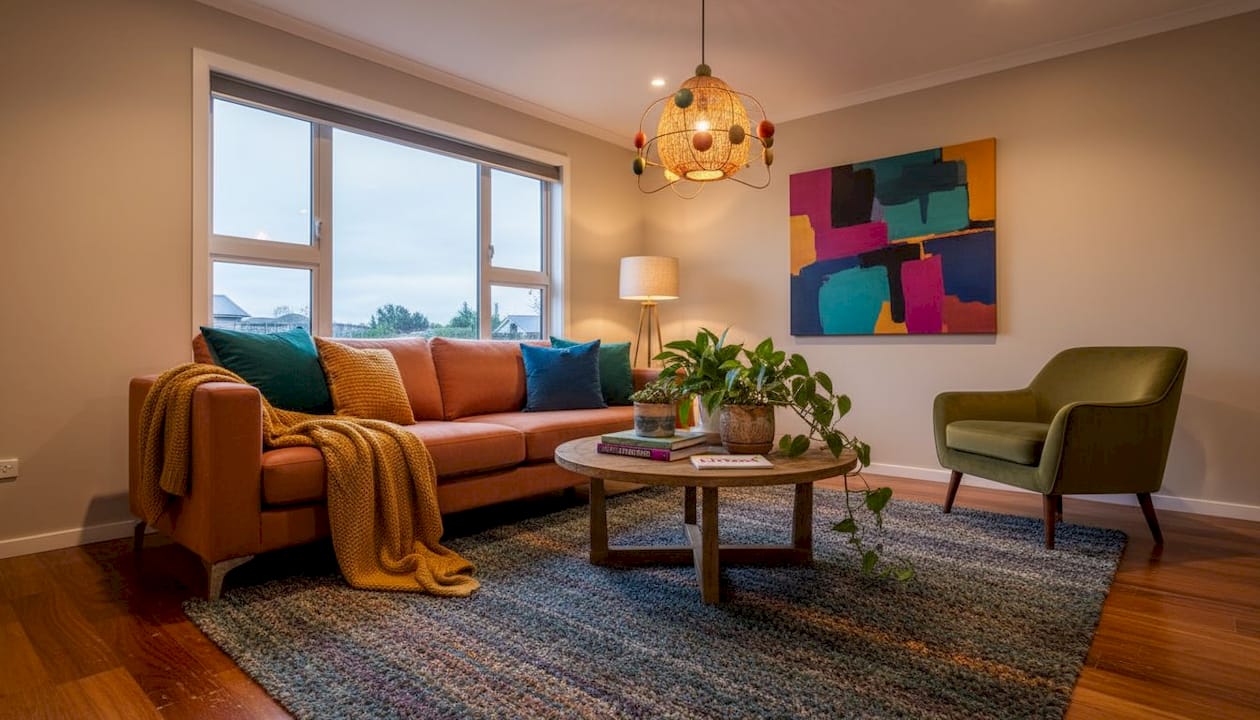
Understanding the principles of layering lighting at home is the single most impactful step you can take before purchasing a single globe. The table below helps match fixture types to rooms by priority.
| Room | Primary fixture | Secondary fixture | Accent option |
|---|---|---|---|
| Kitchen | Recessed downlights | Pendants over island | Under-cabinet LED strips |
| Lounge | Floor lamp | Wall sconce | Table lamp |
| Study | Adjustable desk lamp | Recessed downlight | None required |
| Bathroom | Ceiling flush mount (IP rated) | Vanity bar light | Mirror light |
Explore the best modern lighting types to refine your selections once your plan is in place.
How to install and adjust fixtures for best results
Your arrangement plan is ready. Now let’s get those fixtures installed and tweaked for the perfect effect.
Installation is where planning becomes permanent. Take this stage seriously, work methodically, and know your limits when it comes to electrical work.
-
Turn off the circuit at the switchboard before touching any existing wiring. Verify the circuit is dead using a voltage tester, not just by flicking the light switch. This is non-negotiable.
-
Mark fixture positions on the ceiling or wall based on your plan. Use a stud finder to locate joists and ensure secure fixing points for ceiling pendants or heavy flush mounts.
-
Install mounting brackets first before connecting any wiring. Ceiling roses, canopy brackets, and wall plate fixings should all be firmly anchored before you handle the electrical connection.
-
Call a licensed electrician for any hardwired fixture installation, particularly in bathrooms, kitchens, or any location requiring a new circuit or wiring modification. New Zealand law requires licensed tradespeople for this work.
-
Position adjustable fixtures intentionally. Track heads should angle at roughly 30 degrees to vertical to avoid glare and produce the most flattering wash across surfaces. Pendants over tables should hang 700 to 900mm above the surface. Wall sconces positioned at 1500 to 1700mm from the floor align with natural sightlines and create the most comfortable ambient wash.
-
Adjust dimmers after installation to confirm they are compatible with your LED globes. Not all dimmers work with all LED drivers, and incompatibility causes flickering or a buzzing sound that will drive you to distraction.
Legal note: In New Zealand, all hardwired electrical work including bathroom lighting in Zone 0, Zone 1, or Zone 2 must be carried out by a registered electrician. IP ratings of IP67 for Zone 0 and IP44 minimum for Zones 1 and 2 are not optional specifications. Using a non-rated fixture in a wet zone creates a serious safety risk and voids your home insurance.
Pro Tip: Always double-check that the circuit is off before touching any wiring. A voltage tester costs under $30 and is the most important tool you own during installation.
Common DIY pitfalls to avoid include: installing a pendant too high and losing the visual connection with the surface below; choosing a fixture that is disproportionately small for the room’s ceiling height; using the wrong globe type for a dimmer; ignoring cable length and ending up with awkward cord bunching; and failing to account for the fixture’s weight on plasterboard without proper backing.
Explore sculptural lighting ideas for inspiration on fixtures that bring genuine form and presence to a room, and consider choosing statement fixtures when working with larger open-plan layouts that need a strong visual anchor.
Testing, tweaking, and styling your finished look
With your fixtures installed and adjusted, it’s time for some finishing touches and professional-level tweaks.
Once everything is in place, resist the urge to declare the job done. The testing and styling phase is where the difference between a competent installation and a genuinely beautiful interior reveals itself.
Begin by measuring your actual lux levels using a smartphone app such as Lux Light Meter (available for both iOS and Android). Stand in each zone and take readings at the working surface or seated eye level. Cross-reference your readings against the recommended lux benchmarks: 150 lux or above for general living rooms, 300 to 500 lux for task areas. If a zone is falling short, consider adding a secondary fixture rather than simply swapping to a brighter globe, which can easily create harsh, unbalanced light.
A quick visual inspection tells you a great deal as well. Stand in the doorway of each room and observe whether the light creates depth and variation, or whether it reads as flat and uniform. A room where you can see clearly but cannot perceive any shadow or gradient is almost certainly under-layered.
Quick adjustments that make an immediate difference include:
Repositioning track heads or adjustable pendants to redirect light onto a wall surface rather than straight down, which adds perceived volume to the room. Swapping a cool-white globe for a warm white equivalent at 2700K, which immediately softens the atmosphere without touching the fixtures. Adding a table lamp to a corner that feels visually dead, which introduces warmth and anchors the furniture arrangement. Raising or lowering pendant height by as little as 100mm, which can shift the entire character of the space from functional to intimate.
Styling your lighting within the broader decor context is the final and most personally rewarding step. A bronze or brass pendant globe picks up warmth from timber flooring. A sculptural concrete fixture paired with raw linen softens an otherwise minimal room. Lighting and textiles should speak the same visual language. Layered lighting in NZ homes works best when each layer has its own character, and the whole arrangement reads as intentional rather than accumulated.
Pro Tip: Install dimmers in every room where you can. The ability to shift from 100% brightness for practical tasks to 30% for evening ambience is the single most transformative feature a modern NZ home can have. Good statement lighting inspiration always starts with flexibility, not just form.
The goal is not perfection on the first attempt. The goal is a space that you can tune, adjust, and refine as you live in it. Lighting is dynamic, and your arrangement should be too.
A designer’s perspective: What most guides miss about modern lighting
Most lighting guides tell you where to put things. Very few tell you why copying a standard layout often produces a polite, forgettable result.
The truth is that memorable interiors are rarely built from default fixture positions. They come from someone who was willing to place a pendant slightly off-centre, to mount a sconce lower than convention suggests, or to leave one corner deliberately dim so that the lit areas feel more vivid by contrast. Light needs shadow to have meaning. A room that is evenly illuminated from every angle has no drama, no focal point, and no real presence.
We have seen homes transformed not by expensive fixtures but by movable lamps placed with intention. A single floor lamp angled to graze a textured wall can pull a space out of the safe, polite middle and into something genuinely expressive. The fixture does not have to be extraordinary. The placement does.
Real design confidence comes from understanding the rules well enough to know when breaking them serves the room better than following them.
Experiment with layering like a pro before settling on any fixed arrangement. Movable fixtures are your most valuable design tool, not a compromise.
Ready to transform your space? Get inspired and shop lighting now
If these ideas have sparked something, there is no reason to wait. Lifted+ brings together a curated edit of modern sculptural lighting designed specifically for the modern New Zealand interior. Every piece is chosen for form, presence, and seasonal relevance, so what you find is never generic.
Explore our statement lighting for NZ homes editorial for styled room guides that show exactly how each fixture type performs in real spaces. From bold pendants to tactile floor lamps, the right fixture is waiting to bring your arrangement to life. Browse all home decor and discover what a considered lighting choice can do for your space today.
Frequently asked questions
What does IP44 or IP67 mean for bathroom lighting?
IP44 means the fixture is splash-proof and safe for most bathroom zones, while IP67 is fully waterproof and required inside shower or bath zones (Zone 0) in New Zealand.
How bright should lighting be in living rooms?
Most living spaces should reach at least 150 lux for comfortable visibility, with task zones like reading corners needing 300 to 500 lux.
What colour temperature is ideal for a modern NZ home?
Warm white bulbs at 2700 to 3000K deliver both visual comfort and a contemporary look that suits most modern Kiwi interiors beautifully.
Can I safely install lighting fixtures myself?
You can install plug-in and some surface-mount lights yourself, but any hardwired fixture or wet area installation must be carried out by a licensed electrician under New Zealand law.